Tuesday, October 29, 2013

Sweet & Salty No-Bake Bars

BOO!


Hee hee hee hee!

I love this time of year. A lot of people say that, and I'm one of them.  First of all, I'm totally a cold weather person. Us cold-weather people seem to be rare, but we do exist. I'd much rather snuggle up under a blanket, with my nose all froze and a cat on my lap and a good movie on tv, oh, like "The Princess Bride" or something.  Totally my idea of an awesome evening.

And there are so many good memories for me, that are somehow linked to this chilly fall weather. It reminds me of the start of the school year; when I was younger I loved school, because there was so much new stuff to put into my brain!  It reminds me of our Halloween trip a couple years back, getting to visit my best friend in Colorado and introducing my husband to my extended family. Heck, just the feeling late at night when it's all cold and dark reminds me of the many nights driving down from New Jersey to Virginia, when my husband & I were in the early months of our courtship.


For a lot of people, I guess cold weather signals the end: the end of bathing suits and flip flops and miniskirts and mani/pedis.  For me the cold weather is a beginning. It's the beginning of comfy sweaters and squishy comforters, of big stompy boots (mine are purple!) and big warm coats, of mostly rain and a little snow, and stew and homemade bread and Christmas shopping and that wonderful way the trees look at dusk when they're all dark and wet against a light grey overcast sky.
I love this stuff.


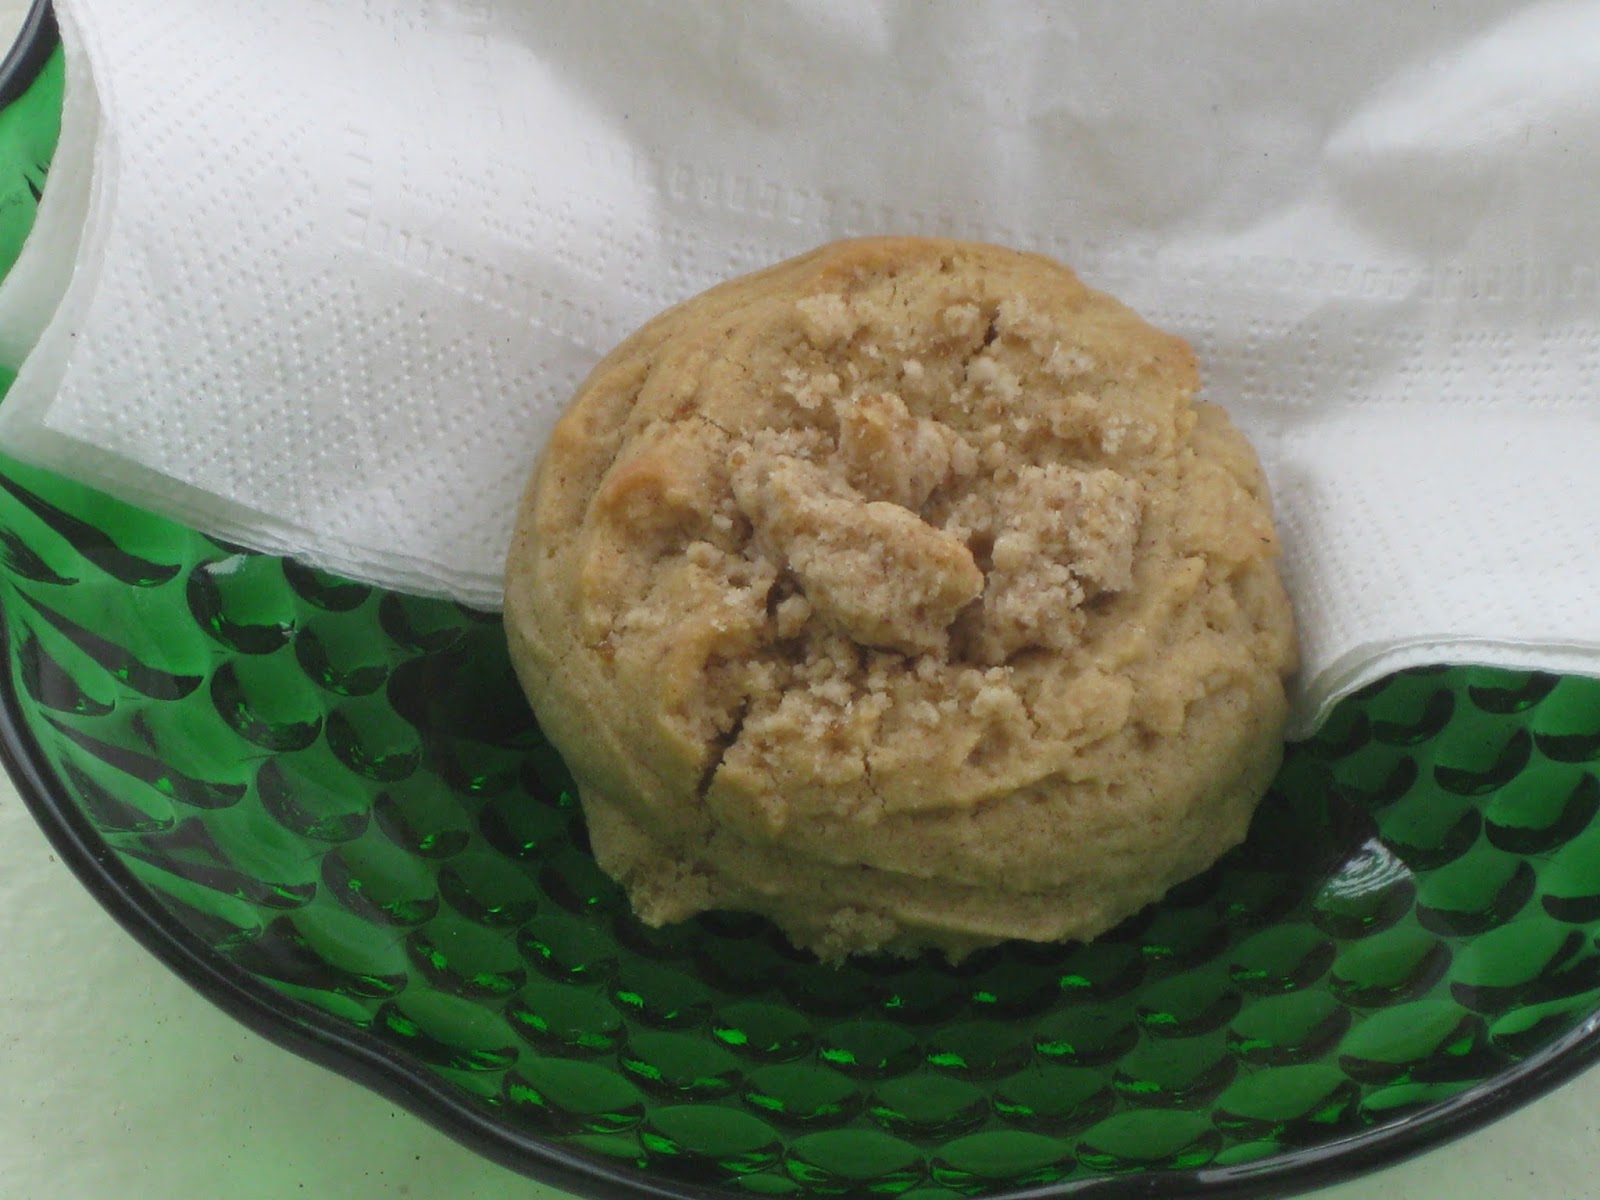
So anyways, we're gonna start you off with some Halloween treats. Admittedly, they're only Halloween treats if you stick some candy corn on top, but you can spook people by telling them that you made dessert out of Fritos. Heh heh heh!

With thanks to Confessions of a Cookbook Queen.

Ingredients

1½ cup of light corn syrup
1/2 cup of sugar
1½ cup of crunchy peanut butter
1 bag of Fritos, 10.5 ounce
Approx 2 cups of candy corn

1) Pour the Fritos into a large bowl and break them into medium pieces. I used a potato masher for this, and it worked pretty well. Make sure your candy corn is ready to go.
2) Grease a 9x9" square baking pan liberally with butter or coconut oil.
3) Pour the sugar and corn syrup into a medium saucepan over medium-high heat. Stir occasionally until it comes to a boil.
4) Lower the heat to low, and stir in the peanut butter. Keep stirring until it's completely combined.
5) Pour the sugar liquid over the Fritos and stir it up with a wooden spoon until well-covered.
6) Press this down into the 9x9 pan, and immediately press on the candy corn; don't wait, or else the bars will get too cooled for the candy corn to stick.

Voila! That's all there is to it. And honestly, it's pretty darn good.


Thursday, October 24, 2013

Honey Spice Cookies

Something's been on my mind for a while.


It's an odd topic of conversation, but it pops into my head every time some new controversy comes out, and it's this:

Every major religion reminds us to love each other, because we can't seem to remember to do it ourselves.
Think about it. The great religious leaders of the world have never told us to to do the obvious things that come naturally.

Commandment #4: Eating is good. Eat something every once in a while.
Commandment #5: Go to bed if you're tired. Try to do this on a regular basis. Once a night is a good place to start.
Commandment #6: Dropping a hammer on your foot is a bad idea and may result in broken toes. Don't do it, unless you really like broken toes. Then, you know, whatever.

You know what I mean?


But they all tell us to love each other.  The Torah says to love your neighbor as yourself (Leviticus 19:18) and that the universe is built on kindness (Psalm 89:3).   Jesus said "love each other, as I have loved you" (John 15:12), and that that commandment to love your neighbor was the second greatest in the whole of the law (which was a pretty big law, by the way) (Matthew 22:39-40).  The Quran 'recommends us to patience and compassion' (Al'Quran 90:17-18), and the Prophet himself said "Kindness is not found in anything except that it adds to its beauty."

Those are the big three religions here in America, but there are more. You want more?
Lao Tzu said: I have just three things to teach:
 simplicity, patience, compassion.
 These three are your greatest treasures.

And the Dalai Lama said on Facebook just the other day, "if you cultivate loving kindness, compassion and concern for others, there will be no room for anger, hatred and jealousy."  I follow the Dalai Lama on Facebook. Those little reminders to peace and compassion are good.

But see? We need those little reminders. Compassion and kindness don't come naturally to humanity. And you may think that you're just fine, but how did you react to Miley Cyrus' on-stage performance? Hmm?

Sigh.
I dunno, man. It's kinda sad. So next time you get all ready to let fly some judgmental vitriol, maybe stop and remind yourself to compassion. You lose nothing in being kind. You know? You really don't.

Here. Have a cookie.


(Thanks to Averiecooks.com as always.)


Ingredients

1/2 cup (1 stick) butter
3/4 cup brown sugar
1 egg
1/4 cup honey
1½ tablespoons pumpkin pie spice
1 tablespoon vanilla
2 cups flour
2 teaspoons corn starch
1 teaspoon baking soda
1/8 teaspooon (a pinch) salt

1) Whisk together the flour, corn starch, baking soda, and salt in a bowl until combined.
2) In another bowl, with either a hand mixer or a stand mixer, cream the butter and sugar together very well, for about 5 minutes, until light and fluffy.
3) Add the egg and beat some more.
4) Add the honey, spices, & vanilla and beat some more, scraping down the bowl as necessary to make sure everything is well incorporated.
4) Now set the mixer to low/medium, and carefully add in the flour mixture. Only mix this until combined, about a minute or so.
5) With a cookie scoop or ice cream scoop, scoop out little balls of cookie dough and set them on a plate, then put the plate in the fridge to chill for at least 3 hours.
6) After the afternoon has passed, preheat your oven to 375º.
7) Place your cookie balls on a cooking sheet that has been covered with parchment paper. You can space these pretty close together, they won't spread much.
8) Bake at 375º for about 10 minutes, until the cookies are just beginning to set on top. Allow them to cool on the baking sheet for about 5 minutes before transferring them to a cooling rack.

If you want, you can finish these off with a glaze:
1 tablespoon light corn syrup
1 tablespoon butter, melted
2 tablespoons milk
2 cups powdered sugar


Whisk together all of these ingredients, let them sit for a few minutes to thicken, and then pour over the cookies. Yay glaze!


Well, I started off this post feeling a little sad and thoughtful, but now I'm full of cookie happiness. I'm not a big pumpkin pie spice person (I'd much rather have a vanilla chai) but these are good stuff. They make you feel warm and happy. Full of compassion. Give your neighbor a cookie too.


Thursday, October 10, 2013

Peach Streusel Bars


I just finished watching Season 10 of Project Runway.
Yes, I know, that's like 2 years ago. But I wanted to start a whole season from beginning to end, and Hulu doesn't have all of season 12. 
I've never been a watcher of Project Runway. Fashion design never really appealed to me, mostly because we've all seen those horrible... things pop up online. You know what I mean--pictures of a man with a bucket on his head and a giant eye appliqued across his chest and a weird tentacle skirt and barbed wire flip flops. You know, fashion. Ugh. I never understood that, and I kinda thought that's what runways were about. Runway shows were about people wearing buckets and eyeballs and wires and legos and frog entrails and high art, while in China other people were sitting behind sewing machines industriously turning out beige cardigans for the Target shoppers of the world.

But I work from home, and I need something innocuous going on the computer to keep me company, something that won't take a lot of attention but still affords some minor entertainment value. America's Next Top Model turned into The Tyra Show Where Some Poor Schmucks Humiliate Themselves In Public For Her Entertainment some years back so that's out, and Masterchef is over (yay Luca!). Ok. Project Runway. Whatever, I don't have to pay attention.


And you know what? It was actually really good!  I was rooting for Christopher the whole time, he seemed like such a sweet boy, and you have to love your hometown boy (woo LI FTW!)  if he's not a jerk. But he really did seem to lose his head at fashion week, so I'm glad Dmitri won. Dmitri was the jerk, for the first few episodes, but he opened up and became nice & respectful to the people around him and it was really nice to see. I liked him. I also agreed that he seemed the most ready to enter the field, so I agree that he deserved the win based on his ability.


None of this has anything to do with what we're making today. In fact, I guess that this little bar is more fashion backward--no chocolate, no sprinkles, no food-equivalent-of-glitter (whatever that might be).  Just a little hidden surprise.  Surprise! Peaches!


Ingredients


1 cup (2 sticks) butter

2 cups flour
1/2 cup brown sugar
1/2 teaspoon cinnamon
1/4 teaspoon salt
-
1/4 cup (1/2 stick) butter (not softened)
1/2 cup flour
1/3 cup brown sugar
1/2 teaspoon cinnamon
1/4 teaspoon salt
-
1/2 can of peach pie filling, chopped
-
1 tablespoon light corn syrup
1 tablespoon butter, melted
2 tablespoons milk
2 cups powdered sugar

1) Preheat your oven to 350º. Line an 8x8 baking dish with aluminum foil & spray it with cooking spray.

2) Combine first 5 ingredients in a mixing bowl until it completely pulls together into a cohesive dough.  Everything should pull away from the mixing bowl and even pull off of your fingers. When there's no crumblies left, it's good.
3) Press this out into your baking dish.

4) Using a spoon or your fingers, press indentations into the shortbread base. I used the back of a cookie scoop.  Then pinch and prod the dough until it looks like the inside of an egg carton, with 9 indents (3 across, 3 down).

5) Bake at 350º for 15-20 minutes, until brown & set.
6) While this is baking, make the streusel topping. From the second group, combine the flour, sugar, cinnamon & salt.  Then cut in the butter with a pastry cutter or a couple of forks and combine until you get chunky crumbs. Put this in the fridge for now.
8) After 15-20 minutes, when you pull the dish out of the oven the dough will have puffed up. Using the back of a spoon, push your indents back down again.
7) Roughly chop up the peaches into small pieces. Spoon some of the peaches into each indentation.  Pour the liquid over the top along the ridges of the "egg carton" crust.
8) Pull the streusel topping out of the fridge and distribute it over each peach "cup". 
9) Back in the oven to bake at 350º for another 25-30 minutes. The edges will look golden brown and well-done in places.
10) Remove and let cool on a wire rack.
11) The glaze (optional, really, but pretty yummy): combine all the liquid ingredients of the final group, then whisk in the powdered sugar until you get a smooth, creamy consistency. Pour it over!

Note: When you cut the bars, you want to cut along the ridges that you made earlier, into 9 bars. This way, the peach filling doesn't spill out all over the place and make a huge mess--until you bite into it!


Thursday, October 3, 2013

Cheesy Mustard Pretzel Dip


OMG guys... my computer this week went all sorts of splodey. It all started with a video game, as thinkg are wont to do in this household. I was trying to play a video game and everything was laggy and jumpy (video game lag is what it's called when the game starts looking like a series of still photographs instead of a moving movie), so I decided to buy a new video card.

I get the new video card delivered, but it doesn't want to work with my monitors. I have old monitors. Well, okay then, let's order a new monitor. While I'm waiting for the new monitor to arrive, the mouse decides it no longer wishes to move the cursor left & right because up & down is the only way to go. Okay, order a new mouse.

Part of the problem with the mouse is that it was constantly getting cat hair stuck in the works, so I was always having to pull out the hair with tweezers, which scratched up the works inside. The cat hair was a problem because I had a fabric mousepad and the hair would weave itself into the fabric, then worm into the mouse.  Well I don't want this to happen with the new mouse, so I order a new mousepad.

New mouse arrives and the very next day, the power supply dies. The power supply takes the electricity from the wall outlet and distributes it to the various parts of the computer. If the power supply ain't happy, ain't nobody happy.

So by Friday I've got a video card but no monitors, a mouse but no mousepad, and no power supply.  UPS guy delivers the monitor, (No, I don't want to discuss home-based coffee-selling businesses, thank you, you can go now Mister UPS Man), I run out to Best Buy to get a power supply, and when I come back Fedex gives me the mousepad. After a flurry of unpacking and 2 hours spent setting everything up, ("what do you mean, No Boot Disk Found????"), my house looks like Circuit City exploded all over it and I'm finally ready to go: new video card, new monitor, new mouse, new mousepad, new power supply.

Isn't that cool?

That your computer can break, that things can fall apart, but it's so easy to just go out and buy new parts and pop them in. Honestly, that level of self-sufficiency feels really cool. If you've never stuck your hand inside a computer's gizzards, I highly recommend you do so. Make sure you unplug it first.

Special shout-out to my friend Mike, who played the very important role of holding my hand via text, making me feel, well, less alone in my stress. ("Yes, I've checked the SATA cables twice, it's still not booting up!")

So here's some pretzel dip. It's easy, it's yummy, and if you like dipping food in stuff, it's really good! Recipe adapted from Jensfavoritecookies.com.


Ingredients
1/2 cup brown or spicy mustard (not plain yellow mustard nor dijon)
1/4 cup mayonnaise
1/4 cup greek yogurt or sour cream
2 tablespoons horseradish or wasabi
1/4 cup dark soda (cola, root beer, Dr Pepper...)
1½ cups shredded sharp cheese (cheddar, or cheddar jack mix)

1) Add all ingredients to a small pot and cook on medium/low, stirring constantly, until the cheese is melted and everything is combined. Bonus points if you let it sit too long and parts start to caramelize.
2) Serve warm with pretzels or breadsticks.

See? Isn't that easy? And pretty tasty too!
Lunch!


Thursday, September 26, 2013

Easy Brown-Butter Oven Pancakes

So, there are some things that I just can't cook.
Like, I've tried and I've tried and I just can't cook it. I decide to cook it and it turns into the food equivalent of bowling. Have you ever seen me bowling? It's hilarious. I never get more than 50 points, and my bowling ball either stops halfway down the lane or ends up hitting people 2 lanes over.


Yes, I'm that lady, the one who throws the bowling ball sideways.

Have you seen me cook rice? I throw my rice sideways too. We have a rice cooker, for crying out loud, and it's wonderful and perfect and so easy to use ("add one scoop of rice, fill water up to the line, turn the machine on") and I still end up with brown, crunchy, dried out, burnt rice.

So in my mind, there are some things that my husband must do. It's part of his job description as "husband". He is in charge of hamburgers, rice, mowing the lawn, and barbecues. I know it's weird, but in my head, there's still "girl things" and "boy things", and mowing the lawn and using a barbecue grill belong to "boy things."  

Mind you, that's only for me. If other women want to mow the lawn and use a barbecue grill, that's fine, rock on with your bad selves, have fun. If we had a daughter and she was dead set on mowing the lawn I'd be perfectly happy telling her to ask her father to show her how it's done. But just for me, the person who is sitting inside my TARDIS socks and Dalek Christmas t-shirt, those are boy things and I will never do them.


And he also makes the pancakes because I just have no patience at all to sit there with pancakes at the perfect temperature to keep them from turning burnt. And I get food all over myself just trying to feed the cats in the morning (cat gooshyfood juice splattering onto your clothes is really disgusting, by the way; you want to take a second shower just to get the smell off); can you imagine what I would do with pancake batter?

Here's an easy, practically foolproof way to make just one big ol' pancake in the oven. This one batch will feed 4 people easily (although you may want some bacon and juice on the side), or make 3 people quite full, or give 2 people leftovers. 


I didn't even get any on my shirt.

Ingredients
1/4 cup (1/2 stick) butter
1 cup flour
1/4 cup sugar
1 cup milk
2 eggs
1 good pinch of salt
1 tsp cinnamon 
1 tsp vanilla
optional: 1/4 cup of slivered almonds, great for texture and protein

1) Drop the butter in an 8x8" baking dish or round souffle dish. 
2) Turn the oven to 350º and put the cold butter & baking dish inside.
3) Walk away for 15 minutes. The oven will heat up and the butter will melt and turn into brown butter in the meantime. When you open the oven again, the butter should be popping, liquid, and have a mass of brown grains at the bottom of the liquid.
4) Remove the dish from the oven and just set it on top of the stove while you mix the batter.
5) Combine all remaining ingredients except the optional nuts in a mixing bowl with a wooden spoon until just combined. You want it a little bit lumpy. 
6) Pour the batter into the baking dish, right on top of the butter.
7) Toss the almonds or walnuts on the top.
8) Bake in the heated oven at 350º for 45-50 minutes, until the top is golden brown and feels pretty firm to the touch. Expect the pancake to rise really tall in the oven, and then deflate after cooling.
9) Serve with pancake syrup, or powdered sugar, or fancy jam.

There you go! Easiest pancakes ever. And it's really good with some fancy jam. We had a jar of apricot hibiscus jam that's been sitting there patiently waiting to be used, and this was a really good use. The almonds were crunchy, the jam was sweet & tart, and breakfast was done with minimal damage to the kitchen. 

You have to appreciate minimal damage to the kitchen.


Thursday, September 19, 2013

Irish Potatoes

Tonight my husband was off at a fraternity meeting so I had the whole evening to myself. Eat all the dinners early!


And then since we're off work tomorrow I am required by law to stay up past my bedtime, which means I got hungry again, hours after dinner happened, which means digging in the fridge.


(This story is going somewhere, I promise.)

I put together a bunch of weird random things, threw them in the microwave to melt together, and then ate them with some leftover nacho chips. And I'm sitting here at my desk, drinking my favorite beer, eating my random-stuff-pulled-out-of-the-fridge-and-microwaved-together with my tortilla chips, and I'm thinking to myself, "Who does this??? Who pulls random stuff out of the refrigerator and microwaves it together into a mush and just eats it with Tostitos Scoops like it's normal and not 'random stuff from the fridge'? Isn't that what college students do? I'm 35 years old! I'm a grown woman!  What the **** am I doing?"

*munch*munch*munch*

"Well. It is pretty good, actually."

*munch*

"It's queso dip."


There you have it.  When a teenager pulls random stuff out of the fridge and microwaves it for dinner, they get chicken ramen with grape jelly and cream cheese.  When I pull random stuff out of the fridge and microwave it for dinner, I get queso dip.

And it was pretty good.

In the spirit of pull-random-stuff-out-of-the-fridge-and-eat-it, I present to you Irish Potatoes.

There's no potato in them.

Ingredients
1/4 cup (1/2 stick) butter
4 oz (1/2 package) cream cheese
1 teaspoon vanilla
2½ cups powdered sugar
2½ cups flaked/shredded coconut
3 tablespoons cinnamon*

1) Combine the butter & cream cheese with a mixer, stopping frequently to scrape down the bowl, until well-combined and pretty soft.
2) Mix in the vanilla.
3) Pour in the powdered sugar and mix on low until well combined.
4) Next mix in the coconut.
5) Get out a flat surface like a small cookie sheet or a large food storage container. Grease your hands, and roll the mixture into small, half-dollar sized balls. Place them on the cookie sheet.
6) Chill the balls in the freezer for 10 minutes, or in the refrigerator for an hour. You want them cold and firm, but not rock solid. Just firm.
7) Put the cinnamon in a baggie or a bowl. Remove the candies from the freezer/fridge, and either roll them in the cinnamon or put them in the baggie and shake them to coat.
8) Store covered in the fridge.


This is definitely not a fancy candy. This is "I'm craving something sweet but I don't want to have to work too hard to get it." This is "I need something fun to do with the kids that will give keep them occupied and isn't too complicated." This is "oh crud, it's 8 o'clock at night and I'm supposed to bring something for the party at work tomorrow."

Not fancy. But still good! Yeah, still good.  Nomnomnom...

Note: Some people find these too cinnamony and they use half cinnamon, half sugar. Or half cinnamon, half unsweetened cocoa powder. However, traditionally they're made with all cinnamon. Personally I don't find them too cinnamony at all, and trust me I'd complain if they were.


Thursday, September 12, 2013

Home-made Marshmallow Twix

Time to divulge another guilty secret.
For many, many years, I have considered myself a "hardcore" girl.
I loved hardcore music. Metal. Metal was great. Especially industrial. Gravity Kills, KMFDM, Pop Will Eat Itself. I still love those things. I'll still hold onto my Kidney Thieves albums, and there's nothing like Slipknot for when you really need to buckle down and get some work done.


But I loaded up my mp3 player the other day (I love this thing!) with my favorite songs and went to town cleaning the kitchen and making candy and suddenly realized I was singing and shaking my tush to Phil Collins. Two hearts! living in just one mind! Beating togeeeether! 'Till the end. of. time!
I thought back to what I'd put on the Sansa...  Phil Collins. Phillip Roebuck. Bruce Springsteen. Julie Fowlis

I guess we really do turn into our parents when we get older. And I guess we stop feeling so angry all the time. I don't remember when I started singing Ani DiFranco's "Angry Anymore", but it's been at least seven or eight years. 

I, I think I understand
And I know what all the fighting was for.
Oh but I just want you to understand
That I'm not angry anymore. No I'm not angry anymore.


Remember that itchy, angry feeling you had when you were a teenager? That feeling like you wanted to run out of your own skin and just run and run and run and end up anywhere but where you were? Because you knew, you just knew that there was a fantastic great big world out there full of meaning and beauty and reality if only you and everyone around you could see it? 

Have some kindness and emmpathy and compassion for the young people around you. And give yourself permission to rock out to Phil Collins or Neil Diamond or whatever else makes you happy. Kindness, compassion, find your own happiness. 


And then make some candy.
I was inspired by these Peanut Butter Caramel Twix Bars but I had to go my own way. (You can go your own waaaay, go your ooown waaaaaay!) (You get 5 points if you're singing that song in your head now.)  

Ingredients:
-Group 1-
1/2 cup (1 stick) of butter, room temp
1 cup flour
1/4 cup brown sugar, packed
Good pinch of salt

-Group 2-
1/2 (2 stick) butter (salted is better than unsalted)
1/2 cup sugar
1/2 cup brown sugar (dark brown gives the caramel color we're more used to)
1/2 cup light corn syrup (light as in color, not calories)
1/2 can sweetened condensed milk (14 or 15oz can)
1/2 tablespoon vanilla

-Group 3-
4 ounces (1/2 small jar, or 1/4 large tub) Marshmallow Fluff
1 cup semi-sweet chocolate chips
1 tablespoon vegetable oil (I used coconut oil)

-The crust
1) Preheat your oven to 350º. Line an 8x8" baking pan with aluminum foil and spray the sides well with cooking spray. 
2) Combine Group 1 ingredients in a mixing bowl until it is completely combined.
3) Press this out into your baking dish.
4) Bake until light golden brown, about 15 minutes, then set it aside on a wire rack to cool.

-The caramel
5) In a large microwave safe bowl (the largest that your microwave can fit), microwave the butter in 30 second intervals until completely melted.
6) Pour in the sugar, brown sugar, condensed milk, & corn syrup and microwave again for 3:30 (3 and a half) minutes.
7) Take out and stir, mixing completely, and scraping down the sides with a rubber spatula. (Spoonula, how I love thee!)
8) Microwave again for another 3 and a half minutes (3:30). The caramel should be a good strong medium tan color now.
9) Take out the bowl and very carefully add in the vanilla. Expect a lot of bubbling & frothing. 
10) Let it sit on the counter for about 20 minutes or so. Go read a book, grab a snack, watch Family Guy, whatever.
11) Once it's cooled down a bit, pour it over the shortbread bars and set the pan in the freezer to chill. You want the caramel to get pretty hard; 20-30 minutes will do.

-Construction-
12) Carefully pour or scoop out the marshmallow fluff on top of the caramel. Working slowly & gently, push it little by little until it covers the caramel as much as you can. Try not to mix it in too much.
13) Put the bars back in the freezer to get the marshmallow layer stiff.
14) Microwave the chocolate chips in a glass or other microwave safe bowl. Stop every 15 seconds and stir. Be very careful not to burn the chocolate; when it looks mostly smooth, you can take it out and stir it smooth the rest of the way. Let the chocolate cool down for a little bit. Take 5.
15) Remove the bars from the freezer and pour the chocolate on. Pour it back & forth in thick lines, then use an offset spatula, or even a pancake turner, to carefully "pull" the chocolate out and flood the layer. You should be able to do it without scraping the marshmallow if you're careful.
16) Back into the fridge to set. The hard work is all done! Now give it some time to chill (a couple hours, or overnight), cut it into small bars with a nice long, sharp chef's nice, and nom away!  Note: You might want to store this in the freezer or else the marshmallow starts running out. It's ok, you can eat these frozen.

I just wanna say, by the way, that this is my absolute favorite go-to recipe for caramel. If you think this is too much caramel for the bars, feel free to pour any excess into a freezer-safe container and keep it in the freezer for months and months. It's absolutely perfect as caramel sauce, and thaws out & re-freezes like a dream!

And as for the bars? You don't need to double this recipe. You want to make this recipe just at this size, cut it into teeny tiny little pieces, and indulge yourself with sticky, gooey chocolatey fingers.


Thursday, September 5, 2013

Coffee Cake Cookies

I'll just have one.
Ever notice that you go through phases? And sometimes your brain says "yeah, sure, this is nice, but you know it's just a phase."  And then your Second Thoughts says "well it might not be, this time." First Thoughts says "yeah, but it probably is."  Third Thoughts says "wouldn't it be nice if it weren't though?"

Lately I've been getting into the all-natural skincare scene. My dermatologist told me to use a certain commercial brand of facial cleanser and moisturizer, but I really only think she said that because she was in a hurry and had coupons.  That and it's perfectly legal for pharmaceutical companies to give doctors kickbacks for recommending their products. Yeah, I have no idea how that's okay, but whatever.

Maybe two.

So anyway the commercial cleanser that my doctor recommended for me because I was having no luck with commercial cleansers was just not doing the job. Protip: if your skin feels really clean after you wash it, and then starts to feel greasy a few hours later, then you're not getting enough moisture.

Anyway, thanks to some new friends at The Nurtury on Main Street in Gloucester, VA, and Juniperseed Mercantile on Etsy, I now have red clay face wash, rosemary & vinegar toner, coconut lime verbena shampoo, and apple cider conditioner. Woo! I'm excited.  Doesn't take much to get me excited.

That and I just painted our bedroom dresser purple.

Because why not.

Three and that's my final offer!

So in the spirit of yay new stuff, here's some coffee cake cookies. They're really big and soft and lovely, and chock full of cinnamon sugar goodness. Also, you get to use a pastry cutter

This recipe was taken directly from the lovely blog Cookies & Cups. Normally I adapt and update and change things a smidge, but not this time.  Well, ok, that's not quite true; I cut the streusel topping amounts in half, because I have a lot leftover. But that's it.
Scoop!

Ingredients

1/3 cup brown sugar
1/2 teaspoon cinnamon
1/4 teaspoon salt
1/2 cup flour
1/4 cup (1/2 stick) butter (not softened)
-
10 tablespoons (1¼ stick) butter
1/3 cup Crisco
1 cup brown sugar
1/2 cup sugar
Fill!
2 eggs
1½ teaspoon cinnamon
2 teaspoons vanilla
2 teaspoons baking powder
1 teaspoon salt
3⅓ cup flour

1) Preheat oven to 350º.
2) Whisk together the first 4 ingredients in a medium sized bowl.
3) Cut in the butter, then use a pastry cutter or a couple of forks to combine until you get chunky crumbs.
4) Put this bowl of chunky crumbs in the fridge and start the cookies.
5) Mix together the Crisco, butter, and both sugars in a mixing bowl until they resemble mashed potatoes.
Now this is too brown.
6) Add eggs one at a time and keep mixing.
7) Add the cinnamon and vanilla and keep mixing.
8) Add in the flour, baking powder, and salt, and mix on low until combined into a nice cohesive dough.
9) Scoop cookies with a medium cookie scoop, or form into nice round balls, and place on a lined cookie sheet. Using the back of a teaspoon measuring spoon, make an indent in the top of each cookie.
10) Fill the indent with the streusel topping from the fridge.
11) Bake at 350º for 10 minutes or so, until the edges just start to tan. Do not overcook these!
12) Allow cookies to cool on the cookie sheet for 3 minutes before transferring to a wire rack.

I was going to make a vanilla glaze to drizzle on top but honestly I just couldn't wait to eat these. They are so good, all soft and warm and pillowy. And you can eat them for breakfast because coffee cake is okay for breakfast, right? And these are coffee cake cookies so it's mostly the same thing.

Mmmm, breakfast cookies!

Thursday, August 29, 2013

Bacon Cheddar Biscuits

Once, when I was just a wee little girl, my mother said something that has stuck with me forever and ever (about 30 years) until this very day. And lately I've been thinking about it a lot. It might have profound implications, a rare insight into my mother's sense of herself.  Or it might not, really, I dunno, I could be reading too much into things. (I do that a lot.)


My mother--her name was Trudy--said, "I don't like to put on very bright lipstick, because I don't want it to be like 'Here comes Trudy's Lips!'"

It makes me sad. Today I think, why not? What's wrong with Trudy's lips? Ok, my mother's lips were rather on the thin side, but there was nothing wrong with them. Why shouldn't she wear bright lipstick for everyone to see?

We should all be bright peacocks! We should all wear bright bright colors--vivid, unforgettable colors--that announce to the world "Here I am, and I am gorgeous!" Wear vivid red boots with a dramatic blue dress! Carry a searingly yellow umbrella and bright pink lipstick! Be special. Be brilliant. Don't hide away, because you deserve more than feeling like you need to hide away.  Don't tell yourself that you're not worth looking at, because you are. Everyone is worthy of being loved.  And you know how old people always seem to get away with stuff we can't get away with? Like mismatched lipstick, hilariously blue hair, and inappropriate statements? Get away with it now. "You shouldn't have to wait 'til you're 90 to be delightfully yourself." --Danielle Corsetto.

Sure, haters are gonna hate. Psh, let them. They're just jealous, because you're fabulous.

Be fabulous.

On that note of fabulosity and insanely vivid flavors, I present to you Bacon Cheddar Biscuits. They're very much like Red Lobster's famous Cheddar Bay biscuits, but with bacon! Yaaaaaaaaaaaaaay!

This recipe is slightly adapted from one given to me by my friend Julie, mainly in that she used Bisquick, and we don't have any. Had to make my own, so that's the first set of ingredients. If you have Bisquick, you can skip that first group. Also, she recommends that you chop up your bacon before frying it, instead of after, and it is easier than trying to chop up hot bacon later, but just be warned that that bacon is going to pop a LOT as you stir it to cook, so you might want to wear a welding helmet or something. At least wear long sleeves.  Oh yeah, and I added parsley too, 'cause if there's green stuff in it, we can say we're eating our vegetables.


Ingredients

3 cups flour
1½ tablespoons baking powder
1/4 tablespoon salt
1/4 cup Crisco (or lard, or unsalted butter)
-
or 3 cups of Bisquick
-
2 tablespoons garlic powder
1/2 cup dried parsley
1 (12oz) package of bacon
2 cups shredded cheese
2½ tablespoons of bacon grease
1¼ cup milk

1) Preheat oven to 400º.
2) Chop up the raw bacon. I pulled it out of the package, did not separate the strips, and just cut down across the strips with a chef's knife.
3) Put the bacon in a frying pan & cook it on medium, stirring every few seconds to break up the pieces. It will pop and hiss a lot, so you really might want a long-sleeved shirt for this. Cook until crispy.
4) In a large mixing bowl, whisk together the flour, baking powder, and salt. Then cut in the Crisco with a pastry cutter or a couple of forks until it's all mixed together very well.  If you're using Bisquick instead, just measure 3 cups of Bisquick into a large mixing bowl.
5) Mix in the garlic powder, parsley, and cheese.
6) Drain the bacon grease into a glass measuring cup or bowl.  Add the cooked bacon to the large bowl of biscuit mix.
7) Measure out 2½ tablespoons of the bacon grease, and add that to the biscuit mix along with the milk. (Discard the rest.) Stir until well combined.
8) Drop the dough in about 1/3cup-sizes onto cookie sheets lined with parchment paper, and bake for 15-20 minutes, until the edges are browning and they feel firm to the touch. Remove from the oven and let cool on the cookie sheet.

And there you have it! Any cheese and/or bacon loving family will love these. You can even get away with them for breakfast since there's, you know, eggs and bacon.


Early morning bacon biscuit breakfast sun!

Thursday, August 22, 2013

Chocolate Chip Fluffernutter Bars

Today I present to you.... Chocolate Chip Fluffernutter Bars! Yaaaaaaaaaaaaaaaay! (Picture Kermit the Frog waving his hands around the in the air and yelling "yaaaaaaaaaaaaay!" and then you'll know what my head sounds like right now.)


It started off with Averiecooks.com's Nutella-Swirled Peanut Butter Chip Blondies.  Intriguing idea, but as has already been documented, I'm not a big fan of Nutella. Meh.  Ok. So, replace the Nutella with peanut butter.   But peanut butter chips (while yummy) with peanut butter swirls sounds a bit too much. Chocolate chips? Sure! And don't I have some marshmallow fluff in the pantry too...? Yep, sure do!

Thought about putting coconut on top too but whoa there, Nelly! Let's not go crazy!


The end result? Heh heh heh...
The end result is some good stuff. Interestingly, I find I prefer the bites without the chocolate more, so next time I make these (and there will be a next time) I'll leave the chocolate out. Maybe add in coconut?


Ingredients

1 cup (2 stick) butter
2 eggs
1½ cup brown sugar
1/2 cup white sugar
2 tablespoons vanilla
2 cup flours
10-12 ounces of semi-sweet Baker's Chocolate  (or 1½ cups of chocolate chips)
1/3 cup peanut butter (preferably 'chunky' style)
1/4 cup Marshmallow Fluff

1) Preheat your oven to 350º.
2) In a large microwave-safe mixing bowl, heat the butter in the microwave at 30 second intervals, stirring at each interval, until completely melted. Once completely melted, remove bowl from the microwave and set to the side to cool.
3) Take your baking dish, either an 8x13 or two 8x8s, and line it with aluminum foil. Spray the foil with cooking spray.
4) Roughly chop up the chocolate.
5) Now add the eggs to the cooled-down butter and mix them completely.
6) Add both sugars and the vanilla, and whisk until completely mixed to a uniform dark brown mixture.
7) Add the flour, and gently fold until just mixed. When there's no more loose flour, it's done.
8) Fold in the chocolate.
9) Pour out the batter into the baking dish.
10) Take the open jar of peanut butter, and microwave it (without the lid) at 10 second intervals, stirring with the handle of a spoon, until the peanut butter is soft and liquidy. Dot the top of the batter with the peanut butter.
11) Dot the top of the batter with Marshmallow Fluff.
12) Bake at 350º for 20-25 minutes until a toothpick inserted in the center comes out with crumbs but no wet batter.


Thursday, August 15, 2013

Chocolate Cherry Freezer Pie


I know this post is late, and I'm really sorry gang!  But this week has been a little on the crazy-busy side. There was Geek Night at the comedy club, and the day at Busch Gardens, and the Virginia Beach Tattoo Festival...  And I got a new haircut!

It's an awesome haircut.
I love it.

Seriously, I look smoking hot. My hair is completely chopped off and short except for long side-swept bangs in the front, and I'd take a picture for you but the weather's been dismal so the lighting's been dismal, so in all the pics I come out just looking like a floating face with bright red lips.

There's something about a fantastically foxy short haircut that makes you want to wear fantastic perky makeup and big red roses in your hair.

Yeah, this has nothing to do with today's recipe but... you know... Queen of the Segues here.

CHOCOLATE CHERRY FREEZER PIE!

Ingredients

1 package (8oz) of cream cheese, soft but not warm
1/2 tub of Cool Whip
1 box (3oz) of cherry Jello mix
1/4 cup of powdered sugar
1 chocolate cookie pie crust
6 ounces of dark chocolate (either chips or Baker's chocolate)
3/4 cup of cream or half-and-half

Note: to make your own chocolate cookie crust, here's a recipe, but leave out the cinnamon: www.food.com/recipe/chocolate-crumb-crust-239565. I personally used chocolate Fiber One cereal that I crunched up in a freezer bag using a rolling pin. 

1) Mix together the cream cheese & Cool Whip until uniform.
2) Fold in the Jello powder & powdered sugar.
3) Pour into the pie crust.
4) Place the pie in the freezer to chill.
5) While the pie is in the freezer, chop up the dark chocolate if using Baker's chocolate bars. Put the chocolate or chocolate chips in a medium mixing bowl.
6) Heat up the cream on the stovetop, on low-medium heat, until it comes to a rolling boil.
7) Pour the milk over the chocolate in the mixing bowl, whisking continuously. Keep whisking until the chocolate ganache smooths out completely and becomes a shiny liquid sauce.
8) Set the ganache to the side for 20 minutes and go read a comic book.
9) After the chocolate has sat for 20ish minutes, remove the pie from the freezer and pour the chocolate evenly over the top. Return the pie to the freezer for at least another hour. Serve chilled from the freezer or the refrigerator, and store it cold likewise.

I highly recommend topping the pie with the remaining Cool Whip when you serve it. Whipped cream provides a bit of a relief from the tart filling and rich chocolate topping. Delicious dessert for a summer evening!


Thursday, August 8, 2013

Mountain Dew Cake


Gah.
Spent a lot of time today thinking about exercise.
Specifically, how I hate it.
I really do.
All of it.

Yeah, I get it, you're supposed to exercise three times a week and it's good for your body and it's good for your joints and it's good for your blood pressure and it's good for your mental well-being and blah blah blah.

Blah.

I still hate it.

Experts are all like "find some exercise you truly enjoy and just do it!!!!"  Yeah, bugger off. I truly enjoy sitting at my computer, scrolling through weird bug articles on Cracked and eating fancy cheese.

And lifting weights. Maybe I should ask my husband for a Bowflex for Christmas? Set that sucker up right by the computer. Do bicep curls with one hand and shove fancy cheese in my mouth with the other. Use my feet to play Warcraft.

Here's some Mountain Dew cake. Classic gamer food. It could only be more classicker if you dusted it on top with crushed Flaming Cheetos.

Ingredients

1½ cups (3 sticks) butter, softened
3 cups sugar
5 eggs
1 tablespoon vanilla
1 tablespoon lemon extract
3 cups flour
1 cup (8 ounces) Mountain Dew, any variety
-
2 tablespoons Mountain Dew
1 tablespoon lemon or lime juice
2½ - 3 cups of powdered sugar

1) Preheat your oven to 325º. Grease a bundt pan, or 2 loaf pans, very well with butter or coconut oil and put them in the refrigerator.
2) Cream together the butter & sugar until they look like mashed potatoes. Make sure it's nice & soft & well blended.
3) Add in the eggs, one at a time, and mix well after each addition. When you can no longer see any yellow from yolk, go ahead and add in the next egg.
4) Mix in the vanilla and lemon extract.
5) Add in a little flour, then a little soda. Go back & forth, alternating between a little flour & a little soda, until it's all mixed in. I do it in thirds (1 cup flour, 1/3 cup of soda). Mix on low to medium until the batter is foamy and thick.
Slightly overcooked. Still good.
6) Now take your pan(s) out of the fridge and scoop your batter in. Bake at 325º for approximately 60 to 75 minutes. The cake is finished when the top is golden brown and doesn't look like pudding anymore. Let cool completely, and turn the cake out onto a plate or cake platter, before putting on the glaze.
7) The glaze: whisk together the soda, lemon or lime juice, and 1½ cups of powdered sugar in a medium bowl, until it's an even consistency. Then add in powdered sugar--keep whisking!--half cup by half cup, until you get a nice, thick, creamy glaze. Pour it on!

 I like to put cakes immediately into the refrigerator after glazing, just to make sure that the glaze stays put where I artistically (haphazardly) poured it.  You're going to end up with a lot of glaze from this one, but you can just pour all the excess right into the middle hold of the bundt cake. That's the way gamers like it--extra sugary.