Thursday, June 27, 2013

Brown Sugar Shortbread Cookies

Heads up gang, I got a new favorite recipe!  And it has no chocolate, and only 3 basic ingredients that I'm sure you have. With a couple extras, that I'm also sure you have. Ok, that's cheating a bit. It's actually five ingredients. IT'S STILL GOOD.

I've never been a huge fan of shortbread, thinking it dry and character-less, but as I've grown older I've developed an appreciation for things that aren't chocolate. This shortbread is actually pretty good! It's actually pretty good!

You can do whatever you want to this recipe. Cut it with a cookie cutter, cut it with a plain old drinking glass, roll it into a rectangle and cut it into shortbread fingers...  That's what I did, I rolled it into a rectangle and cut it into fingers and drizzled it with caramel and it was fun times.

Make this. Put it in your mouth. And watch "Call the Midwife", it's such a lovely tv show.

Ingredients

2 cups (4 sticks) of butter (cold)
1 cup of brown sugar
4 cups of flour
1 teaspoon of vanilla
1/2 teaspoon of salt

1) Cut the cold butter into pats and drop them into your mixing bowl.
2) Cream the butter and sugar together until fluffy.
3) Mix in the vanilla & salt, and then add in the flour.
4) Once it looks like the dough is mostly mixed through, dump it out onto a silpat or a sheet of wax paper and knead it all together. It will still be somewhat floury and dry, but don't overknead.  As soon as you think "hey, this looks like it's done", then it's done.
5) Put the dough back in the fridge for another hour or so.
6) After the dough has chilled, preheat your oven to 300º.
7) Roll out & cut the dough, or simply scoop out balls, and place them on an ungreased cookie sheet. Trust me, with all this butter, you shouldn't need anything. Just make sure the cookies are about 1/2" thick when you put them in the oven, and poke them all over with a fork so they don't explode.
8) Bake at 300º for 25-30 minutes until they're firmly set and just starting to brown around the edges.
9) Allow the cookies to cool on the cookie sheet, it's ok.


I made a caramel sauce using this caramel, microwaved for 10 seconds and mixed with a drizzle (about 1/2 teaspoon) of milk. Then I splattered the caramel over the shortbread. Caramel, chocolate, sprinkles... Go crazy. Or don't. Still good!


Thursday, June 20, 2013

No-Yeast Middle Eastern Flatbread


I watch reality tv shows.
There. I said it.
I know it's not cool, I know I just lost Whovian points, but yeah. I do.
The Voice? Yup. Hotel Nightmares? Uh huh. MasterChef?  Oh yeah...

My favorite is MasterChef Australia though. Watch MasterChef Australia, and then watch MasterChef (U.S.) and I bet you can see why MCA is so much better.

Since you might have trouble finding an episode of MCA, I'll just tell you the answer: people are nicer. People are kinder. People cheer each other on and help each other cook ("You know that feesh should only take 10 minutes to cook, right mate?"  "Ah, cheers mate.") and the whole group applauds whenever someone else gets  a compliment from the judges. It's just... nicer.  Just because you're competing against someone it doesn't mean that you have to be a jerk about it.

One of the ladies in this year's running of MCA is of Middle Eastern extraction; we know that her husband is Egyptian, but of she herself the website only says "Arabic". Samira el Khafir made an incredible dish called "Chicken & Yoghurt with Almonds & Pine Nuts"--not the fanciest name, but it does what it says on the tin.  There's a flatbread that is a part of the dish that I found intriguing, since it doesn't use yeast, and I'm always on the lookout for bread products that can be made quickly and easily (because yeast breads just take sooo looong; I mean, by the time we decide what we're doing for dinner it's already 630pm, and I should have started the bread like 2 hours ago, but I didn't, because I didn't know we'd want bread, and now it's 7 o'clock and we're grumpy and hungry and ugh, never mind).

I have no idea what this is called. I've looked and looked, and it seems to be related to Afghani bolani (which also looks really good, mind you).  It's a great basic little recipe, and I'm looking forward to making it again with different herbs, spices, and stuffings. PS: I reduced the salt a little because it tasted a little too salty for me.

Ingredients

2 cups of flour, plus extra for dusting
1½ teaspoons of salt
2 tablespoons of olive oil
1 cup of warm water
1/4 cup of oil for cooking

1) Whisk salt & flour together in a large bowl.
2) Slowly add in oil & water and keep mixing until you get dough.
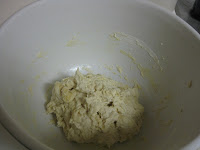
3) Turn out the dough onto a lightly floured surface and knead until mixed evenly. If the dough feels very wet & sticky, add small handfuls of flour until it becomes elastic and sticks to itself instead of your hands. It should naturally form a round blobby shape, not a sticky spiky shape.
4) Divide the dough into 4-6 rounds, put them on a plate or cookie sheet, cover, & let sit for 20 minutes to a half hour. I had kneaded my dough on a large silpat, so I just flipped the edges of the silpat over to cover the dough, and let it sit for a while.
5) Roll out the dough--or just punch it out with your hands--until it's about the size of your largest frying pan. The dough should be pretty thin & soft, almost about to tear.
6) Heat up your largest cooking pan with about 1/4 cup of oil, until the oil is smoking.
7) Cook your bread in the hot oil for about 1-2 minutes on each side, until each side is crisp and golden and lifts up easily. You might want to place these on a paper towel to drain.

Samira uses this exact same recipe to make 14 little dough balls. I have no idea how she did it, because even when I tried to make small dough balls I only came up with about 6 that were dinner roll-sized. I ended up just combining those together to make 4 large flatbreads.

 We tore off pieces of flatbread, filled them with pieces of chicken, lettuce, tomato, onion, and dipped in garlic/dill yogurt sauce, and this was a very satisfying home-made replacement for gyros. You can see there's so much room for experimentation with this recipe!

Thursday, June 13, 2013

Gooey Blueberry Pie Cake

Today was a heckuva day. After spending the morning wrestling with difficult files at work, I was in quite a foul mood and decided to spend my lunch break in my happy place: the dollar store.

I love the dollar store. I do. Give me 20 bucks and 20 minutes and I can just wander up & down the aisles, looking at every new thing minutely. I mean, every week they have different inventory, and it's all just a dollar! Go ahead and try whatever you want; if it broke, or if it's gross, then hey, you're only out a buck.

And it's quite a cross-section of humanity you get there. I know Walmart is famous for its people but I think Dollar Tree has them beat. The lady in front of me in line was demanding that the manager of the store personally guarantee that each bag of buttermints hold 20 mints, "because the serving size says 4 mints and there are 5 servings in a bag so there have to be 20 mints in each bag because there are gonna be a hundred goodie bags and each goodie bag has to have the same amount of mints in 'em and I can't count 'em."

I wish I'd had the chutzpah to hand her a dollar bill and say "if it's that big of a deal, here, go grab another bag of mints."  I only thought of it hours later, anyway. In actuality I just stood there, making this face.

Besides off-brand baked beans and watered-down cleaning supplies, the local dollar store is a great supplier of storage food containers, which are just perfect if you want to bring your friends a fresh-baked treat but don't want to worry about getting your dish back. You know, something like pie or cake or blueberry pie cake. Mmmm, blueberry pie cake...

This recipe is a bit of a combination from my favorite baking blog and the recipe on the back of the can of pie filling. 'Cause it seemed like a good idea at the time.

Ingredients

-Cake-
3 cups of flour
1½ teaspoons of baking powder
1 teaspoon of salt
1 cup (or 2 sticks) of butter
1¾ cups of sugar
1/2 cup of brown sugar
4 eggs
1 teaspoon of vanilla extract
2 teaspoons of lemon extract
2 cans of blueberry pie filling

-Glaze-
1½ to 2 cups of powdered sugar
2 tablespoons of lemon or lime juice
1/2 teaspoon of vanilla

Like this, but without the seashells.
1) Preheat oven to 350º.
2) Line a 13"x5" casserole dish with aluminum foil (or two 8"x8"s, which is what I have).
3) Whisk together the flour, baking powder, & salt together in a large bowl.
4) In a different bowl, cream together the butter & sugar (brown & white sugar) until it looks kinda like moist beach sand.
5) Slowly add in your eggs to the butter/sugar, one at a time, beating & scraping the bowl after each addition.
6) Now fold in your vanilla and lemon extracts.
7) Slowly fold in your flour mixture, a little bit at a time, so you don't get flour all over your counters.
8) Next, take a 1 cup dry measuring cup and scoop out a heaping 1 cup scoop of batter.
9) Spread the rest of the batter into the bottom of your casserole dish.
10) Bake at 350º for 20-25 minutes, until the edges are set. This will get you a gooey cake. For less gooey, bake 30-35 minutes until golden brown.
11) Remove the pan(s) from the oven and spoon the pie filling over the top. I used one can for each 8x8 dish.
12) Take that extra 1 cup of batter that you reserved and drop it onto the blueberry filling with a teaspoon. Or your fingers. Whatever.
13) Bake for another 35. minutes until the batter on top is nice and gold.
14) Remove from the oven and let cool.
15) To make the glaze: whisk together the glaze ingredients until you get a nice syrupy liquid with no lumps. Use powdered sugar to thicken it, use lemon or lime juice to thin it. Pour the glaze over the top.

Now this is something that'll take that bleah cruddy day and turn it into happiness. The nice chewy cake base, just like my favorite sugar cookies, with the heavy sweet hit from blueberries, and the bright pop of citrus to pull it up. And yes, that these are very, very messy. The nice part is that you can just grab the whole thing out of the casserole dish via the aluminum foil, plop it in an off-label 'tupperware' container*, and give it to your best friend. Now it's her mess to deal with. Mwah ha ha haaaa!

*Are we the only family that calls all food storage containers "tupperware"? I mean, I haven't seen an actual Tupperware™ brand container in years, but that's all they'll ever be to us. I guess it's like Jello™.


Thursday, June 6, 2013

Ice Cube Tray PB&J Cups

Welcome to yet another edition of........ I Bet You Already Have The Ingredients!
Let's have a warm round of applause for tonight's host: Peanut Butter & Jelly Cups!
Lemme melt on, like some chocolate in the sun!

Because, you know, sometimes you feel like making something but it's like a hundred and eight degrees outside and you take one look at that bright shiny sun trying to kill you and you think "yeah, no, that's not gonna happen" so you snuggle down more in your central air conditioning because that's why God invented central air conditioning.

I know some of you people are summer people, but some of us just want to live in Nunavut.  All the time.

So. Can't leave the house, feel like making something, have a bag of chocolate chips but completely bollocks at dipping things in chocolate...  Let's make candy!

I ran across this recipe at Creativesimplelife.com and kept it up on my internet browser for a few weeks. It just really seems to be a great, easy little recipe that you can adapt for so many things. Like peanut butter and jelly!

Seriously guys, this recipe is so simple, so easy, and it's had the easiest cleanup out of anything I've made so far.  You need an ice cube tray, a medium microwave-safe mixing bowl, another small bowl, a freezer, and a microwave. Ok, and some spoons.

Ingredients

3 cups of chocolate chips
3 tablespoons of vegetable oil (as always I used coconut oil), plus extra to grease the ice cube tray
1/4 cup of peanut butter
1/8 cup of crunchy cereal (I used frosted flakes, but I bet Rice Krispies would be good too)
2 tablespoons of jelly or jam

1) Preheat your freezer to "freeze".
2) "Grease" up your ice cube tray using your vegetable oil. Use your fingers and make sure you get it into every corner.
3) Mash up the peanut butter & cereal together in a small bowl. If using big cereal (like, I dunno, Captain Crunch or something) crush it up first, but otherwise don't worry about getting too technical.
4) Dump 3 cups of chocolate chips into your microwave-safe bowl, and add 3 tablespoons of vegetable oil on top.
5) Microwave your chocolate for 20 seconds, then stir. Continue to microwave in 20 second, stirring intervals, until the chocolate is completely melted through and smooth with no lumps.
6) Pour the chocolate into each well of the ice cube tray, until each well is about 2/3 full. This should take about 2/3 of the chocolate.
7) Spoon approximately 1/4 teaspoon of the peanut butter/cereal mix into each well of chocolate; push it down a little with your finger if you're using ice cube trays with deep wells.
8) Spoon approximately 1/4 teaspoon of jam on top of the peanut butter.
9) Pour out the rest of the chocolate on top to cover up the pb&j.
10) Pop the tray into the freezer, making sure it's resting on a level surface (like, oh, say, 2 loaves of bread sitting side-by-side).
11) Give it about a half an hour to 'set'.
12) Lay out a sheet of waxed paper on your counter (easy cleanup!) and turn your new candies out, just like ice cubes. You can then take a sharp paring knife and trim off the excess chocolate.

Three cups of chocolate chips made exactly enough chocolate for this recipe. And this recipe makes one tray of one dozen peanut butter cups. They're pretty rich though. I couldn't eat more than two. The rest are in sealed containers in my freezer. I'm actually not sure how well they'll freeze in the long term, but, you know, life's fun that way.

Also, while you can of course just do plain peanut butter cups, I highly recommend adding jelly. I found that the strawberry jelly really helped cut down on the richness from all that chocolate, and gave the recipe a pop of brightness.