Thursday, September 26, 2013

Easy Brown-Butter Oven Pancakes

So, there are some things that I just can't cook.
Like, I've tried and I've tried and I just can't cook it. I decide to cook it and it turns into the food equivalent of bowling. Have you ever seen me bowling? It's hilarious. I never get more than 50 points, and my bowling ball either stops halfway down the lane or ends up hitting people 2 lanes over.


Yes, I'm that lady, the one who throws the bowling ball sideways.

Have you seen me cook rice? I throw my rice sideways too. We have a rice cooker, for crying out loud, and it's wonderful and perfect and so easy to use ("add one scoop of rice, fill water up to the line, turn the machine on") and I still end up with brown, crunchy, dried out, burnt rice.

So in my mind, there are some things that my husband must do. It's part of his job description as "husband". He is in charge of hamburgers, rice, mowing the lawn, and barbecues. I know it's weird, but in my head, there's still "girl things" and "boy things", and mowing the lawn and using a barbecue grill belong to "boy things."  

Mind you, that's only for me. If other women want to mow the lawn and use a barbecue grill, that's fine, rock on with your bad selves, have fun. If we had a daughter and she was dead set on mowing the lawn I'd be perfectly happy telling her to ask her father to show her how it's done. But just for me, the person who is sitting inside my TARDIS socks and Dalek Christmas t-shirt, those are boy things and I will never do them.


And he also makes the pancakes because I just have no patience at all to sit there with pancakes at the perfect temperature to keep them from turning burnt. And I get food all over myself just trying to feed the cats in the morning (cat gooshyfood juice splattering onto your clothes is really disgusting, by the way; you want to take a second shower just to get the smell off); can you imagine what I would do with pancake batter?

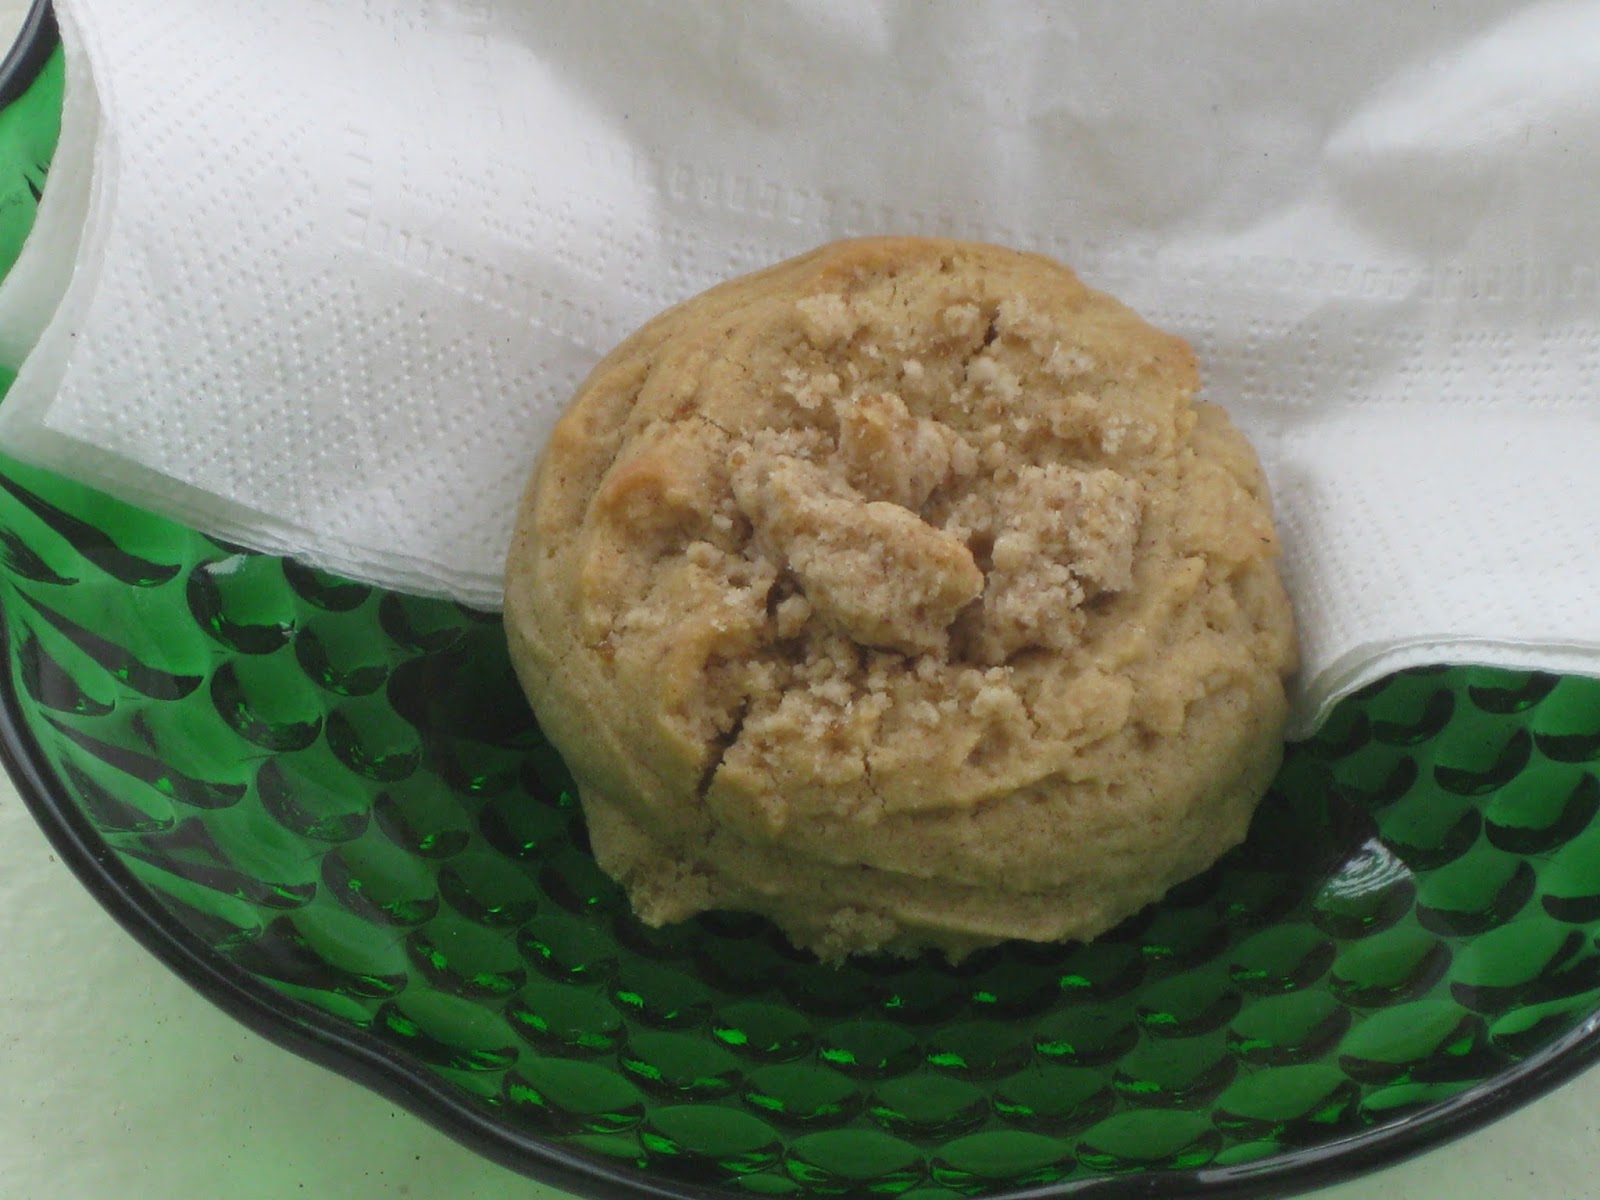
Here's an easy, practically foolproof way to make just one big ol' pancake in the oven. This one batch will feed 4 people easily (although you may want some bacon and juice on the side), or make 3 people quite full, or give 2 people leftovers. 


I didn't even get any on my shirt.

Ingredients
1/4 cup (1/2 stick) butter
1 cup flour
1/4 cup sugar
1 cup milk
2 eggs
1 good pinch of salt
1 tsp cinnamon 
1 tsp vanilla
optional: 1/4 cup of slivered almonds, great for texture and protein

1) Drop the butter in an 8x8" baking dish or round souffle dish. 
2) Turn the oven to 350º and put the cold butter & baking dish inside.
3) Walk away for 15 minutes. The oven will heat up and the butter will melt and turn into brown butter in the meantime. When you open the oven again, the butter should be popping, liquid, and have a mass of brown grains at the bottom of the liquid.
4) Remove the dish from the oven and just set it on top of the stove while you mix the batter.
5) Combine all remaining ingredients except the optional nuts in a mixing bowl with a wooden spoon until just combined. You want it a little bit lumpy. 
6) Pour the batter into the baking dish, right on top of the butter.
7) Toss the almonds or walnuts on the top.
8) Bake in the heated oven at 350º for 45-50 minutes, until the top is golden brown and feels pretty firm to the touch. Expect the pancake to rise really tall in the oven, and then deflate after cooling.
9) Serve with pancake syrup, or powdered sugar, or fancy jam.

There you go! Easiest pancakes ever. And it's really good with some fancy jam. We had a jar of apricot hibiscus jam that's been sitting there patiently waiting to be used, and this was a really good use. The almonds were crunchy, the jam was sweet & tart, and breakfast was done with minimal damage to the kitchen. 

You have to appreciate minimal damage to the kitchen.


Thursday, September 19, 2013

Irish Potatoes

Tonight my husband was off at a fraternity meeting so I had the whole evening to myself. Eat all the dinners early!


And then since we're off work tomorrow I am required by law to stay up past my bedtime, which means I got hungry again, hours after dinner happened, which means digging in the fridge.


(This story is going somewhere, I promise.)

I put together a bunch of weird random things, threw them in the microwave to melt together, and then ate them with some leftover nacho chips. And I'm sitting here at my desk, drinking my favorite beer, eating my random-stuff-pulled-out-of-the-fridge-and-microwaved-together with my tortilla chips, and I'm thinking to myself, "Who does this??? Who pulls random stuff out of the refrigerator and microwaves it together into a mush and just eats it with Tostitos Scoops like it's normal and not 'random stuff from the fridge'? Isn't that what college students do? I'm 35 years old! I'm a grown woman!  What the **** am I doing?"

*munch*munch*munch*

"Well. It is pretty good, actually."

*munch*

"It's queso dip."


There you have it.  When a teenager pulls random stuff out of the fridge and microwaves it for dinner, they get chicken ramen with grape jelly and cream cheese.  When I pull random stuff out of the fridge and microwave it for dinner, I get queso dip.

And it was pretty good.

In the spirit of pull-random-stuff-out-of-the-fridge-and-eat-it, I present to you Irish Potatoes.

There's no potato in them.

Ingredients
1/4 cup (1/2 stick) butter
4 oz (1/2 package) cream cheese
1 teaspoon vanilla
2½ cups powdered sugar
2½ cups flaked/shredded coconut
3 tablespoons cinnamon*

1) Combine the butter & cream cheese with a mixer, stopping frequently to scrape down the bowl, until well-combined and pretty soft.
2) Mix in the vanilla.
3) Pour in the powdered sugar and mix on low until well combined.
4) Next mix in the coconut.
5) Get out a flat surface like a small cookie sheet or a large food storage container. Grease your hands, and roll the mixture into small, half-dollar sized balls. Place them on the cookie sheet.
6) Chill the balls in the freezer for 10 minutes, or in the refrigerator for an hour. You want them cold and firm, but not rock solid. Just firm.
7) Put the cinnamon in a baggie or a bowl. Remove the candies from the freezer/fridge, and either roll them in the cinnamon or put them in the baggie and shake them to coat.
8) Store covered in the fridge.


This is definitely not a fancy candy. This is "I'm craving something sweet but I don't want to have to work too hard to get it." This is "I need something fun to do with the kids that will give keep them occupied and isn't too complicated." This is "oh crud, it's 8 o'clock at night and I'm supposed to bring something for the party at work tomorrow."

Not fancy. But still good! Yeah, still good.  Nomnomnom...

Note: Some people find these too cinnamony and they use half cinnamon, half sugar. Or half cinnamon, half unsweetened cocoa powder. However, traditionally they're made with all cinnamon. Personally I don't find them too cinnamony at all, and trust me I'd complain if they were.


Thursday, September 12, 2013

Home-made Marshmallow Twix

Time to divulge another guilty secret.
For many, many years, I have considered myself a "hardcore" girl.
I loved hardcore music. Metal. Metal was great. Especially industrial. Gravity Kills, KMFDM, Pop Will Eat Itself. I still love those things. I'll still hold onto my Kidney Thieves albums, and there's nothing like Slipknot for when you really need to buckle down and get some work done.


But I loaded up my mp3 player the other day (I love this thing!) with my favorite songs and went to town cleaning the kitchen and making candy and suddenly realized I was singing and shaking my tush to Phil Collins. Two hearts! living in just one mind! Beating togeeeether! 'Till the end. of. time!
I thought back to what I'd put on the Sansa...  Phil Collins. Phillip Roebuck. Bruce Springsteen. Julie Fowlis

I guess we really do turn into our parents when we get older. And I guess we stop feeling so angry all the time. I don't remember when I started singing Ani DiFranco's "Angry Anymore", but it's been at least seven or eight years. 

I, I think I understand
And I know what all the fighting was for.
Oh but I just want you to understand
That I'm not angry anymore. No I'm not angry anymore.


Remember that itchy, angry feeling you had when you were a teenager? That feeling like you wanted to run out of your own skin and just run and run and run and end up anywhere but where you were? Because you knew, you just knew that there was a fantastic great big world out there full of meaning and beauty and reality if only you and everyone around you could see it? 

Have some kindness and emmpathy and compassion for the young people around you. And give yourself permission to rock out to Phil Collins or Neil Diamond or whatever else makes you happy. Kindness, compassion, find your own happiness. 


And then make some candy.
I was inspired by these Peanut Butter Caramel Twix Bars but I had to go my own way. (You can go your own waaaay, go your ooown waaaaaay!) (You get 5 points if you're singing that song in your head now.)  

Ingredients:
-Group 1-
1/2 cup (1 stick) of butter, room temp
1 cup flour
1/4 cup brown sugar, packed
Good pinch of salt

-Group 2-
1/2 (2 stick) butter (salted is better than unsalted)
1/2 cup sugar
1/2 cup brown sugar (dark brown gives the caramel color we're more used to)
1/2 cup light corn syrup (light as in color, not calories)
1/2 can sweetened condensed milk (14 or 15oz can)
1/2 tablespoon vanilla

-Group 3-
4 ounces (1/2 small jar, or 1/4 large tub) Marshmallow Fluff
1 cup semi-sweet chocolate chips
1 tablespoon vegetable oil (I used coconut oil)

-The crust
1) Preheat your oven to 350º. Line an 8x8" baking pan with aluminum foil and spray the sides well with cooking spray. 
2) Combine Group 1 ingredients in a mixing bowl until it is completely combined.
3) Press this out into your baking dish.
4) Bake until light golden brown, about 15 minutes, then set it aside on a wire rack to cool.

-The caramel
5) In a large microwave safe bowl (the largest that your microwave can fit), microwave the butter in 30 second intervals until completely melted.
6) Pour in the sugar, brown sugar, condensed milk, & corn syrup and microwave again for 3:30 (3 and a half) minutes.
7) Take out and stir, mixing completely, and scraping down the sides with a rubber spatula. (Spoonula, how I love thee!)
8) Microwave again for another 3 and a half minutes (3:30). The caramel should be a good strong medium tan color now.
9) Take out the bowl and very carefully add in the vanilla. Expect a lot of bubbling & frothing. 
10) Let it sit on the counter for about 20 minutes or so. Go read a book, grab a snack, watch Family Guy, whatever.
11) Once it's cooled down a bit, pour it over the shortbread bars and set the pan in the freezer to chill. You want the caramel to get pretty hard; 20-30 minutes will do.

-Construction-
12) Carefully pour or scoop out the marshmallow fluff on top of the caramel. Working slowly & gently, push it little by little until it covers the caramel as much as you can. Try not to mix it in too much.
13) Put the bars back in the freezer to get the marshmallow layer stiff.
14) Microwave the chocolate chips in a glass or other microwave safe bowl. Stop every 15 seconds and stir. Be very careful not to burn the chocolate; when it looks mostly smooth, you can take it out and stir it smooth the rest of the way. Let the chocolate cool down for a little bit. Take 5.
15) Remove the bars from the freezer and pour the chocolate on. Pour it back & forth in thick lines, then use an offset spatula, or even a pancake turner, to carefully "pull" the chocolate out and flood the layer. You should be able to do it without scraping the marshmallow if you're careful.
16) Back into the fridge to set. The hard work is all done! Now give it some time to chill (a couple hours, or overnight), cut it into small bars with a nice long, sharp chef's nice, and nom away!  Note: You might want to store this in the freezer or else the marshmallow starts running out. It's ok, you can eat these frozen.

I just wanna say, by the way, that this is my absolute favorite go-to recipe for caramel. If you think this is too much caramel for the bars, feel free to pour any excess into a freezer-safe container and keep it in the freezer for months and months. It's absolutely perfect as caramel sauce, and thaws out & re-freezes like a dream!

And as for the bars? You don't need to double this recipe. You want to make this recipe just at this size, cut it into teeny tiny little pieces, and indulge yourself with sticky, gooey chocolatey fingers.


Thursday, September 5, 2013

Coffee Cake Cookies

I'll just have one.
Ever notice that you go through phases? And sometimes your brain says "yeah, sure, this is nice, but you know it's just a phase."  And then your Second Thoughts says "well it might not be, this time." First Thoughts says "yeah, but it probably is."  Third Thoughts says "wouldn't it be nice if it weren't though?"

Lately I've been getting into the all-natural skincare scene. My dermatologist told me to use a certain commercial brand of facial cleanser and moisturizer, but I really only think she said that because she was in a hurry and had coupons.  That and it's perfectly legal for pharmaceutical companies to give doctors kickbacks for recommending their products. Yeah, I have no idea how that's okay, but whatever.

Maybe two.

So anyway the commercial cleanser that my doctor recommended for me because I was having no luck with commercial cleansers was just not doing the job. Protip: if your skin feels really clean after you wash it, and then starts to feel greasy a few hours later, then you're not getting enough moisture.

Anyway, thanks to some new friends at The Nurtury on Main Street in Gloucester, VA, and Juniperseed Mercantile on Etsy, I now have red clay face wash, rosemary & vinegar toner, coconut lime verbena shampoo, and apple cider conditioner. Woo! I'm excited.  Doesn't take much to get me excited.

That and I just painted our bedroom dresser purple.

Because why not.

Three and that's my final offer!

So in the spirit of yay new stuff, here's some coffee cake cookies. They're really big and soft and lovely, and chock full of cinnamon sugar goodness. Also, you get to use a pastry cutter

This recipe was taken directly from the lovely blog Cookies & Cups. Normally I adapt and update and change things a smidge, but not this time.  Well, ok, that's not quite true; I cut the streusel topping amounts in half, because I have a lot leftover. But that's it.
Scoop!

Ingredients

1/3 cup brown sugar
1/2 teaspoon cinnamon
1/4 teaspoon salt
1/2 cup flour
1/4 cup (1/2 stick) butter (not softened)
-
10 tablespoons (1¼ stick) butter
1/3 cup Crisco
1 cup brown sugar
1/2 cup sugar
Fill!
2 eggs
1½ teaspoon cinnamon
2 teaspoons vanilla
2 teaspoons baking powder
1 teaspoon salt
3⅓ cup flour

1) Preheat oven to 350º.
2) Whisk together the first 4 ingredients in a medium sized bowl.
3) Cut in the butter, then use a pastry cutter or a couple of forks to combine until you get chunky crumbs.
4) Put this bowl of chunky crumbs in the fridge and start the cookies.
5) Mix together the Crisco, butter, and both sugars in a mixing bowl until they resemble mashed potatoes.
Now this is too brown.
6) Add eggs one at a time and keep mixing.
7) Add the cinnamon and vanilla and keep mixing.
8) Add in the flour, baking powder, and salt, and mix on low until combined into a nice cohesive dough.
9) Scoop cookies with a medium cookie scoop, or form into nice round balls, and place on a lined cookie sheet. Using the back of a teaspoon measuring spoon, make an indent in the top of each cookie.
10) Fill the indent with the streusel topping from the fridge.
11) Bake at 350º for 10 minutes or so, until the edges just start to tan. Do not overcook these!
12) Allow cookies to cool on the cookie sheet for 3 minutes before transferring to a wire rack.

I was going to make a vanilla glaze to drizzle on top but honestly I just couldn't wait to eat these. They are so good, all soft and warm and pillowy. And you can eat them for breakfast because coffee cake is okay for breakfast, right? And these are coffee cake cookies so it's mostly the same thing.

Mmmm, breakfast cookies!